[et_pb_section transparent_background=”off” background_color=”#e0cb9f” allow_player_pause=”off” inner_shadow=”off” parallax=”off” parallax_method=”on” make_fullwidth=”off” use_custom_width=”off” width_unit=”off” custom_width_px=”1080px” custom_width_percent=”80%” make_equal=”off” use_custom_gutter=”off” fullwidth=”off” specialty=”off” admin_label=”section” disabled=”off”][et_pb_row make_fullwidth=”off” use_custom_width=”off” width_unit=”off” custom_width_px=”1080px” custom_width_percent=”80%” use_custom_gutter=”off” gutter_width=”3″ allow_player_pause=”off” parallax=”off” parallax_method=”on” make_equal=”off” parallax_1=”off” parallax_method_1=”on” parallax_2=”off” parallax_method_2=”on” parallax_3=”off” parallax_method_3=”on” parallax_4=”off” parallax_method_4=”on” admin_label=”row” disabled=”off”][et_pb_column type=”4_4″ disabled=”off” parallax=”off” parallax_method=”on”][et_pb_text background_layout=”light” text_orientation=”left” admin_label=”Text” use_border_color=”off” border_style=”solid” disabled=”off” inline_fonts=”Rock Salt,Schoolbell”]
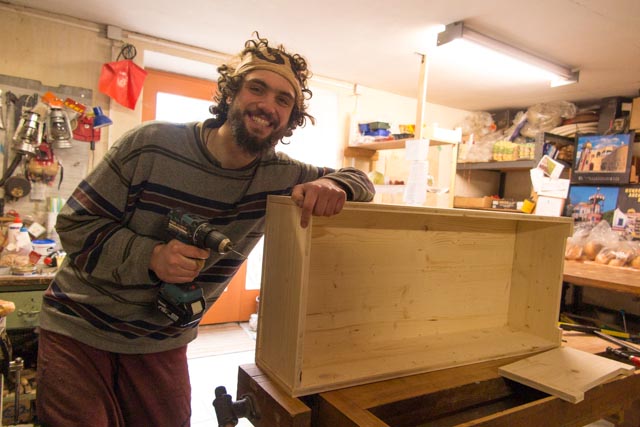
Bienenkisten bauen
Zuerst mussten wir eine Behausung für die Bienen bauen. Es war garnicht so leicht das geignete Beutensystem zu finden mit welchen wir Imkern wollen. Schließlich entschieden wir uns für die Bienenkisten, für sie gab es glücklicherweise die Bauanleitung im Internet. Und so kauften wir Holzplatten und und schnitten sie auf unserer Formatkreissäge zurecht, und schraubten sie zusammen.
[/et_pb_text][et_pb_gallery gallery_ids=”226,227,228″ fullwidth=”off” posts_number=”4″ orientation=”landscape” show_title_and_caption=”off” show_pagination=”off” background_layout=”light” auto=”off” auto_speed=”7000″ admin_label=”Galerie” caption_font_size=”32″ title_font_size=”51″ use_border_color=”off” border_color=”#ffffff” border_width=”1px” border_style=”solid” disabled=”off”] [/et_pb_gallery][/et_pb_column][/et_pb_row][/et_pb_section]